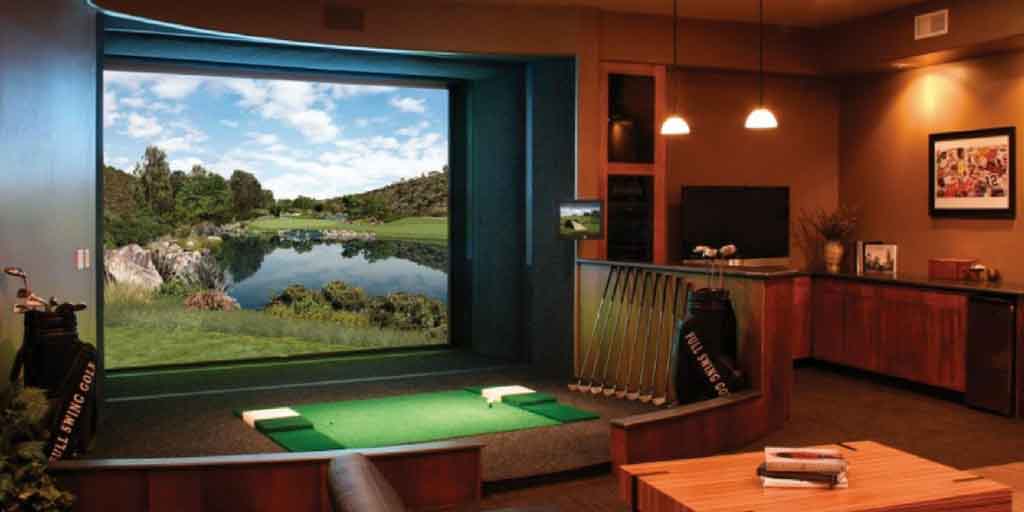
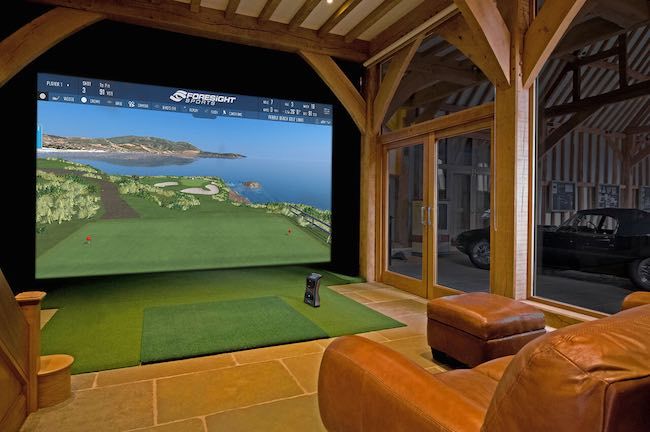
Every golfer has dreams of playing a round of golf in the comfort of their own home. Having a home golf simulator is now within reach for many golfers due to advancements in technology and cost reductions.
For a while, I've wanted to create a comprehensive guide for all of you. I finally got in touch with someone who is an expert in this landscape. Recently I spoke with Cory Gauvreau, who is the President of Par2Pro. They are one of the leading providers of home golf simulators in North America.
After speaking with Cory for two hours, one thing became abundantly clear. There are endless combinations of materials you can use to build a home golf simulator. In his words, it's an absolute jungle out there, which is why he has created a successful business helping golfers navigate that world. Also, I have spent hundreds of hours testing almost every single launch monitor on the market, consulted with multiple experts in the industry over the past six years, and will inject that experience into my recommendations in this guide.
You can spend anywhere from $500 all the way up to $70,000 for a home golf simulator. There isn't one solution that fits all, and the purpose of this article is to give you an overview of the materials you need, the space required, and some options you will have at various price levels.
Be aware that each home golf simulator has its nuanced features, and it will suit golfers' needs separately. If you want to purchase supplies for your home setup, I recommend checking out Shop Indoor Golf. I have referred many Practical Golf readers to them over the years, and everyone has been more than satisfied with their customer service.
I've broken up the article into several sections, which will go over some of the critical things you should know. You can easily navigate using the following table of contents:
Also, here's a short visual story you can watch with a brief summary of our top recommendations.
Update (12/20/2020): I have made many adjustments to this article based on the latest technology available.
Materials You Will Need
To build a home golf simulator, you will need five items. In each category, you will find varying costs based on the quality and durability of each material.
Be cautioned; you will get what you pay for.
If you purchase an inexpensive golf mat, net, or projector, it will likely not last over time. One thing to consider is if this is going to be a long-term fixture in your house. If this is just an experiment, and you will upgrade down the road, it might make sense to go with the less expensive options.
Keep in mind that some of these suggestions are somewhat generic. Cory from Par2Pro does not necessarily stand behind some because he customizes each specific product to a customer's needs.
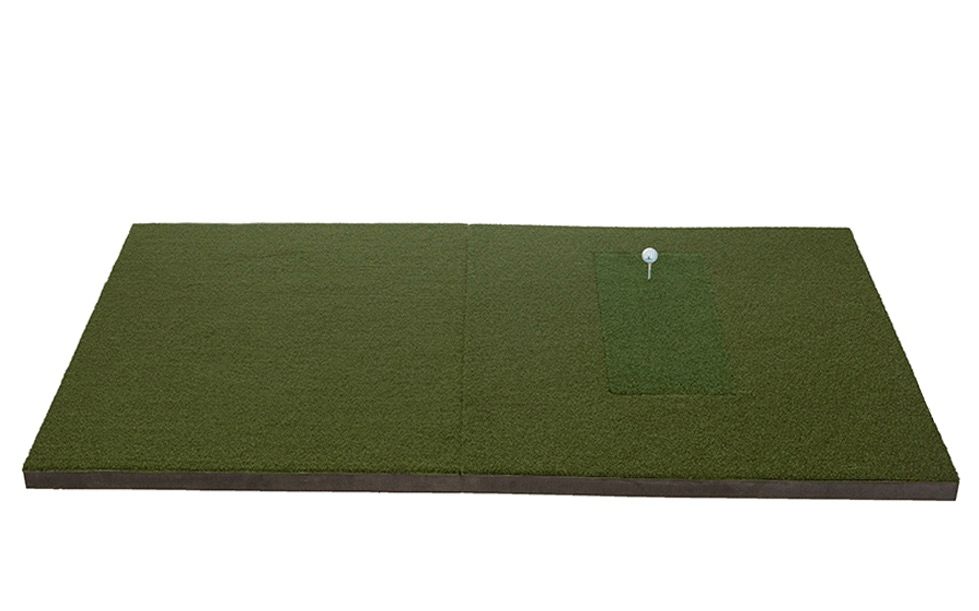
Mats
The one thing Cory stressed is that mats are crucial. Hitting mats are very costly to manufacture because they are so heavy that shipping costs can quickly add up.
There are some budget options available, like this one from Cimarron.
A quality turf mat will cost you a minimum of $300-$500 like this one. They can get as expensive as $800 if you want the best in performance and durability.
My two favorite premium options are the SIGPRO Golf Mat (which I now use) and TrueStrike. After having my home simulator setup for years, I can tell you that it's worth investing in a premium mat. It will make the experience more enjoyable, will help prevent injury, and last longer.
You can also check out my guide to golf mats to find out some more options.
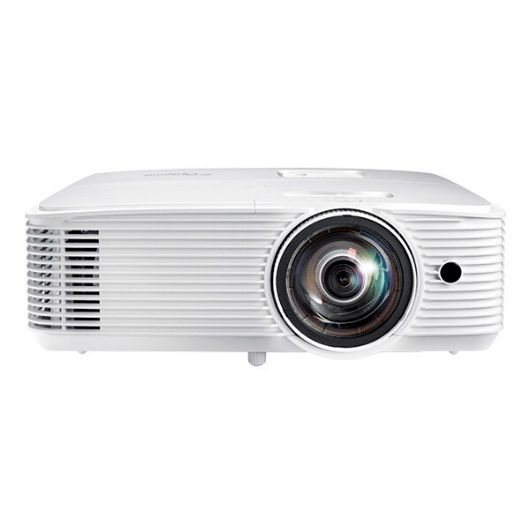
Projector
Projectors can be very tricky for many reasons. Each room will have its own needs based on light, size, and the resolution that the simulator software requires. Not all projectors out there will appropriate for a home golf simulator.
There are far less expensive projectors out there for as little as $100 that might entice you, but you will likely have many usabilities, quality, and longevity issues. You get what you pay for!
Optoma is a brand that typically suits the needs of many home simulators. Their EH412ST model comes highly recommended.
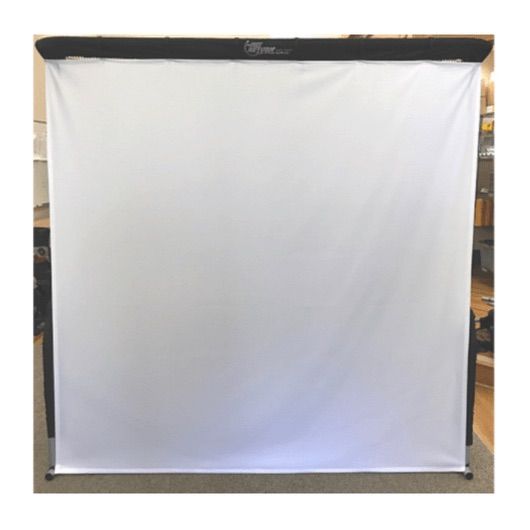
Nets and Impact Screens
To prevent doing any damage to your walls, you will need a net or impact screen.
If you are using a projector, then you will need an impact screen. The price can vary between $250 to well over $1000, depending on the quality and design. Here is an excellent option if you are on a budget. Depending on the room you are using, you should consider putting netting around the impact screen's perimeter for any errant shots.
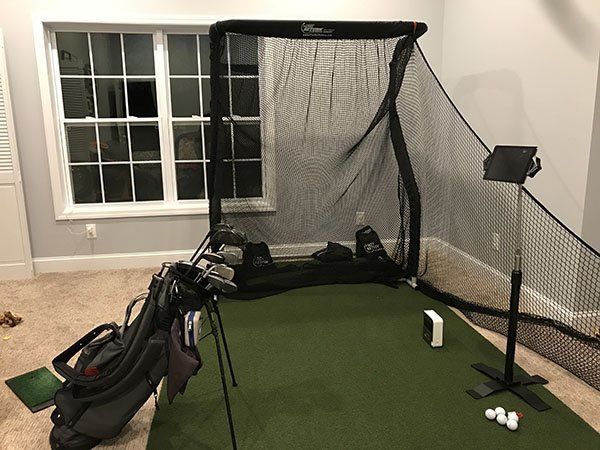
Another option is to use a net without a projector and run the simulator on a computer screen. You can even have it connected to a TV off to the side. This pop-up net from Spornia is a good option for the entry-level. If you want a more premium solution, then check out The Net Return. They are by far the best net, in my opinion. I've hit tens of thousands of shots into my Mini Pro Series over several years, and there is no noticeable wear.
My guide to golf nets explores a few other options as well.
Simulator
This is the most crucial piece of the puzzle for your home golf simulator. The actual sensor system you choose will have an enormous impact on your experience. There are endless variables, and it can be confusing. Your decision depends on the kind of golfer you are, your budget, the size of your room, how important accuracy is to you, and a host of other factors.
I will cover some basics when we get into different budget levels. Each system has its pros and cons, and there is no such thing as a perfect solution for everyone.

Anyone who is a regular reader of Practical Golf knows that I have been a happy SkyTrak user for years (here is my full review). I use it to practice, play simulated courses, and, more importantly, do testing for the site. I'll go over more options later in this article. However, I still believe it's the best overall option for most golfers when you combine its price, accuracy, and simulation software integrations.
Computer
Almost every single simulator package is going to require a PC to run its software. Hardware is an added cost that many golfers will not consider. However, you may already have a laptop, tablet, or desktop option capable of running the software. Before you purchase any home simulator system, make sure you check the recommended system specs from the software you intend to use. If you want to take a deeper dive on this topic, check out our guide to computers for home golf simulators.
Many of the major providers have recently added 4K graphics, and you'll likely need a robust processor and graphics card. Purchasing a gaming computer is usually a smart decision. You want to make sure the computer will perform for future updates as well. I've played on simulators where the computer couldn't keep up with the software, and you'll experience delays and apps crashing. It's not fun!
For example, when I first purchased an iPad for my SkyTrak four years ago (one of the few iOS integrations), it handled the software with no problem. But as updates became available, they required stronger processing power, so eventually, I needed to buy a more recent model because the app was too slow.
Additionally, it's also worth thinking about whether or not you want to have a dedicated computer. It can be annoying to bring a laptop in and out continually. Depending on your situation and the simulator you choose, you might need to figure an extra $500 - $2000 for this cost.
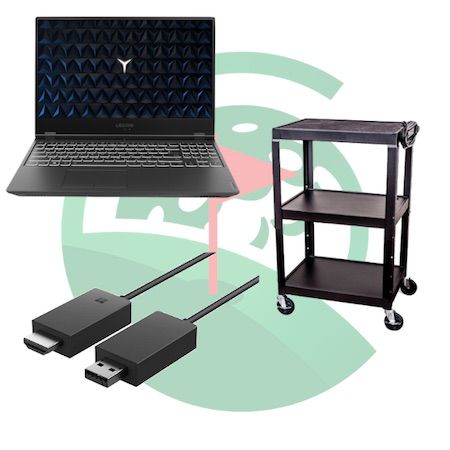
This simulator computer bundle costs under $1800 and will give you a gaming laptop, an AV cart, and a wireless display adapter, which will allow you to stream HD 1080p to your projector without the need for more wires.
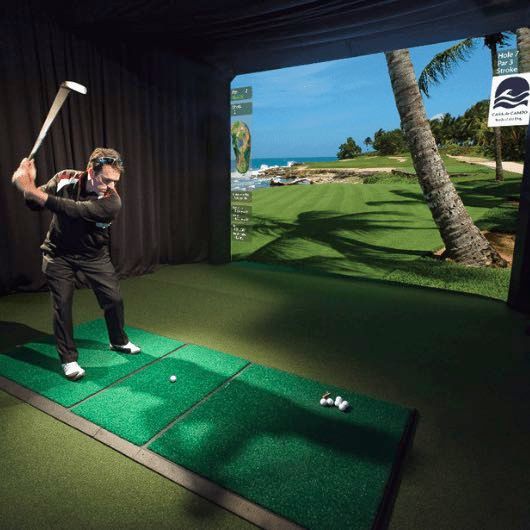
Space Required
The amount of space you have in your home for a golf simulator is also another critical factor to consider. Cory stressed that you want to have enough space to swing a club comfortably. Many times he has seen clients squeeze simulators into small spaces. They may have seemed appropriate before installation, but the golfers found it very difficult to swing freely once the screen and net were set up.
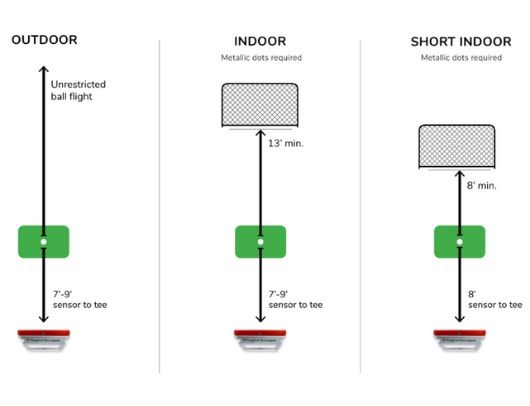
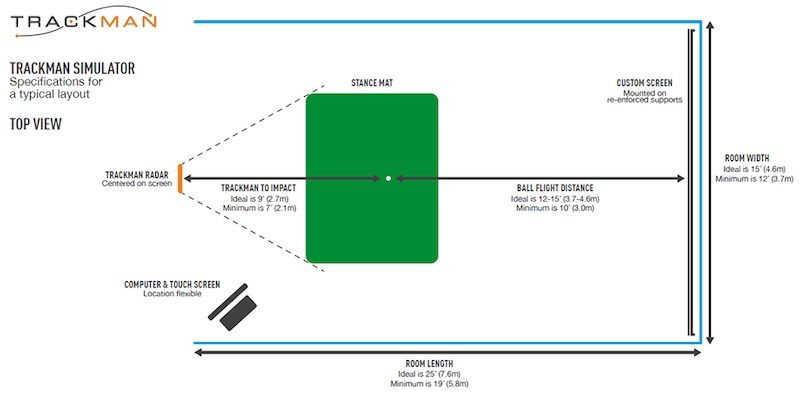
Here is a diagram detailing recommended dimensions from one of the more popular setups:
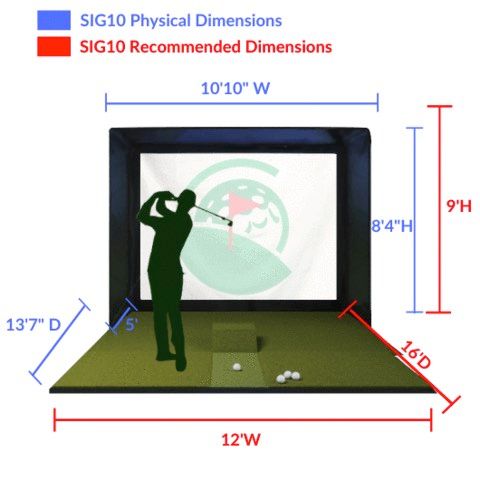
There are three separate components here, and each of them is equally important - ceiling height, room width, and finally, depth.
Ceiling Height
A ceiling height of 10 feet is a "safe" distance that can accommodate most golfers' height and swing type. Cory mentioned that he could build a simulator in a room with a ceiling of 8' 2". However, the couple was shorter than average and had very flat swings. It may be possible for you to swing clubs freely in a ceiling lower than 10 feet, depending on your height and how flat or vertical your swing is. Don't forget to consider other golfers who might be using the space if you plan on having friends or family members use it also.
Room Width
When thinking about the width of the room, there are two things to consider:
- Will the room only be for a right-handed golfer, or will lefties be playing as well?
- Sh*nks happen, do you have enough space to protect your walls?
If you are going to have left and right-handed golfers, then 15 feet could be appropriate. Some people have made it work in rooms that are 9 feet wide, but you might need two sensors or move them back and forth when switching players.
Room Depth
In Cory's opinion, the minimum depth of the room you will need is about 15 feet. This includes 1 foot from the wall to the screen, 8 feet from the screen to the tee, and finally 6 feet of safe distance behind the golfer.
However, if you are using a radar-based system like Trackman, you might require as much as 25 feet.
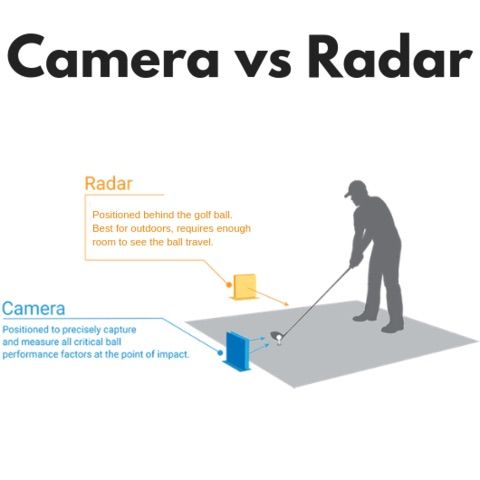
Photometric systems like Skytrak, Uneekor, and Foresight measure from the ball's side, and room depth is not as important. However, radar-based products like Trackman and FlightScope measure from behind the golfer, and it needs to track the ball for a minimum of two revolutions to get an accurate reading.
Overall, Cory recommends laying the room beforehand carefully and taking measurements. Swing all of your clubs in the space, but keep in mind that things might appear smaller once everything is set up due to stance, mats, ceiling, and wall protection.
Another thing to consider is that any home golf simulators can function as a multi-purpose room. Many people will also use it as a home theater, a playroom for children, and even a place to serve Thanksgiving dinner (true story).
Budget/DIY Setup - Under $1000
This is the level that I was most interested in. I know most of you reading this will not be able to invest $10,000 - $70,000 in a home golf simulator.
If you are on a tight budget but want a full simulation experience, you can do it for under $1,000. But there will be some tradeoffs.
At this price point, you are most likely looking at an OptiShot 2 simulator. It's currently around $300, and this is entry-level. You can have plenty of fun with a product like this, but be aware that the accuracy is limited. Optishot only measures the speed, path, and face angle of your club. From there, it calculates where your ball is going but is not directly measuring the actual golf ball after impact. So you might not make great contact, but OptiShot would simulate a shot that was struck almost perfectly. It is essential to understand that the info provided could be misleading on individual shots, which could frustrate players.
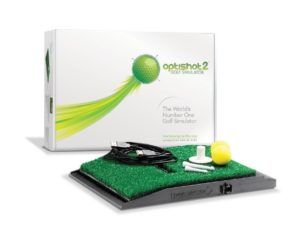
The benefit of using a system like OptiShot is that you don't need to use an actual golf ball. You can use a foam ball or a plastic one. This will allow you to save a ton of money because you don't need to use a high impact projector screen or net. Cory has seen some people use a painter's tarp or a bedsheet.
Recently, I posted this review of Optishot 2 if you want to read more about its features.
The popular "Golf In a Box" package for Optishot is available for under $1000.
If you want to go with a higher quality mat, projector, and net, then you should take a look at the Silver Entertainment package from Shop Indoor Golf at around $3000. You can avoid the hassle of purchasing everything separately and get a better deal overall.
However, if you do want the best experience, I'd suggest investing a little more money. The difference is enormous.
Mid Range: $3,500 - $10,000 (Best Value)
If you have a bigger budget, you can get a much more accurate simulator and increase all the materials you will use. For most golfers, I believe this is the "sweet spot" between money invested and performance. I'll go over several popular options that are now available.
SkyTrak - My #1 Overall Pick
Several years ago, a launch monitor was released called SkyTrak that was geared towards consumers. It was a real game-changer for the home golf simulator market. It offers accuracy on ball data on par (no pun intended) with far more expensive systems. At $2,000, Skytrak is an excellent option for golfers who demand more accuracy. As I mentioned earlier, this is the product I use, and I still believe it's the best overall option.
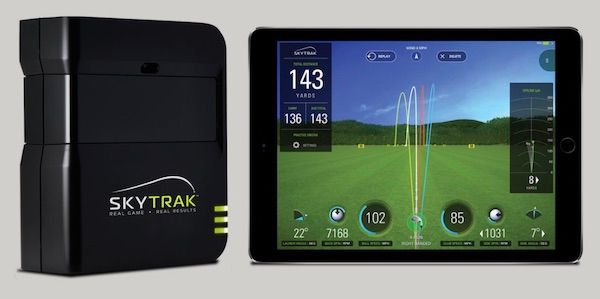
Something to note about Skytrak is that it only gives ball data (spin, distance, etc.). It will not provide measurements on your actual swing.
SkyTrak has many software integrations with companies like E6 Golf, World Golf Tour, Creative Golf, and The Golf Club. These will allow you to play thousands of different golf courses, and SkyTrak also has a tremendous native software package for practice. You should note that many of the software plans come with yearly fees, so that should be factored into your budget.
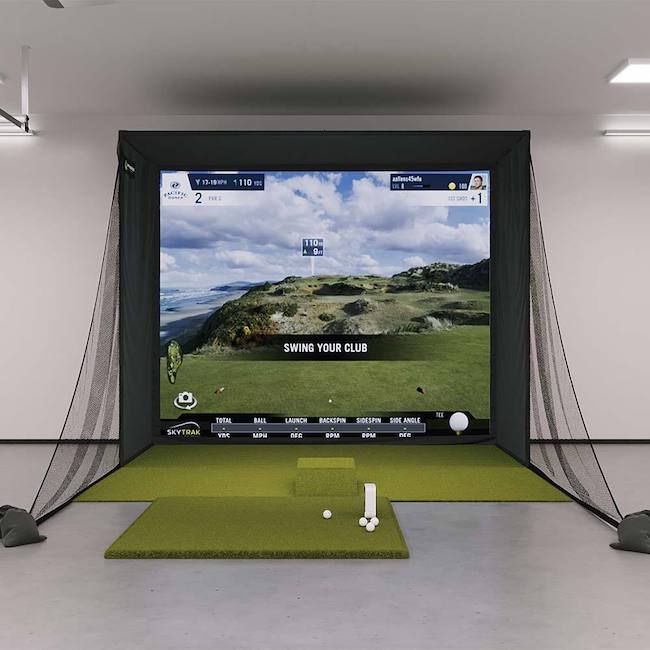
If you have some more money to invest in a unit like SkyTrak, you will want to make sure the rest of the materials you use will last. If you want to purchase everything together, which I recommend, there are plenty of packages available.
Here are three popular options for under $10,000:
Training Package (Under $3500)
SkyTrak SIG10 Package (Most Popular Package)
You can read my full review of SkyTrak here.
TruGolf Simulators
Cory from Par2Pro also mentioned you could take a look at the Vista 8 system from TruGolf. This is a very nice integrated package that is just under $10,000.
You'll get pretty much everything you need - a hitting enclosure, turf, projector, impact screen, and course software.
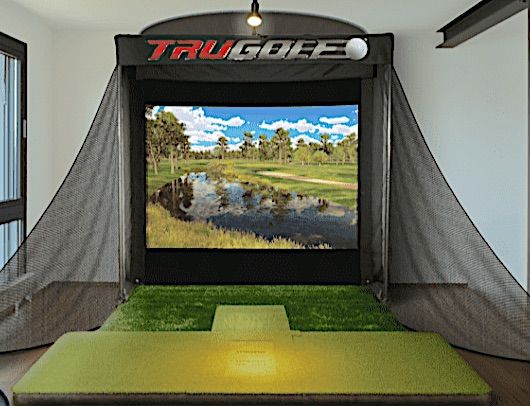
TruGolf provides clubhead data (clubface angle and path) and integration with E6 Connect, one of the best software providers for home golf simulators.
FlightScope Mevo Plus
In late 2019, FlightScope announced their Mevo Plus launch monitor. At just under $2,000, it is a direct competitor to SkyTrak. Both products have very similar features and simulation options. The packages available are identical to SkyTrak.
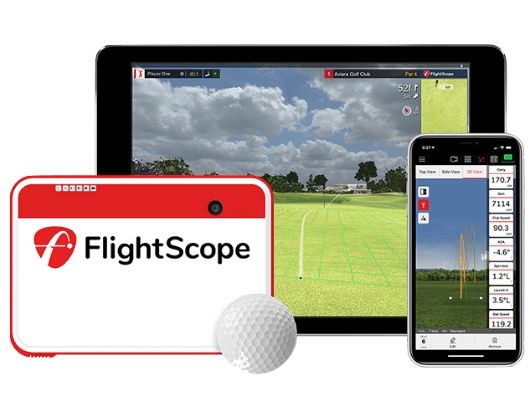
That being said, there are some key differences you should understand. The FlightScope Mevo + uses radar technology to track ball flight (SkyTrak uses high-speed cameras). So if you plan on using the Mevo Plus for your home simulator setup, you will need significantly more space (pictured below).
Based on my testing, the SkyTrak is more accurate than the Mevo Plus when used indoors. If you choose between the two products and exclusively use them for a home simulator setup indoors, I would recommend SkyTrak. If you want a more versatile product that can be used outside at the driving range as a launch monitor, then the FlightScope Mevo Plus would make more sense.
High End: $10,000 and Beyond
When your budget gets beyond $10,000, many more options open up for you regarding the accuracy, software, and quality. I'll give you a few of my favorite options as well as "dream setups."
Uneekor - the New Contender
Uneekor is an exciting new release that has gained popularity in the home golf simulator market. The Korean-based company has two models, the QED and EYEXO. Both launch monitors are mounted to the ceiling and use a mixture of high-speed cameras and infrared technology to capture club and ball data. As I mentioned earlier, I prefer camera-based systems for home simulators because they are generally more accurate. Still, more importantly, they don't require as much space to see the golf ball.

If you are looking to build a permanent fixture in your house and want features above and beyond SkyTrak, you should consider this system. Uneekor does require ceilings that are between 9 - 10.5 feet.
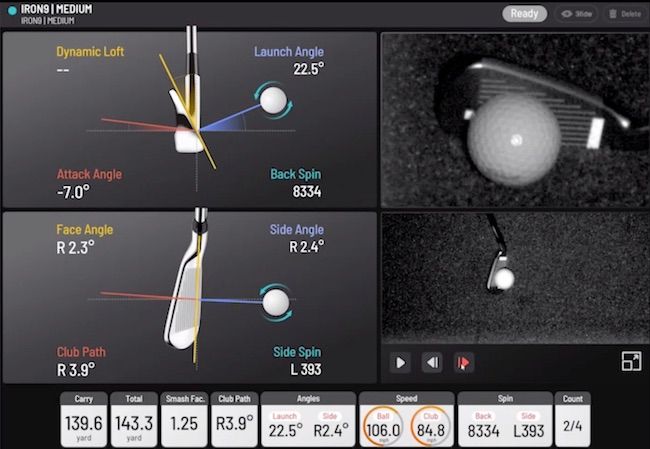
What's impressive about Uneekor is the wide range of data you receive. For example, their higher-end model, the EYEXO, will capture just about everything that happens around impact. Not only will you receive valuable golf ball data such as distance, launch angle, ball speed, and spin rates - but there is quite a bit of club data as well. This video gives a nice overview of its capabilities:
You'll get to see impact location, face angle, club path, and dynamic loft. But what separates the Uneekor EYEXO is that it also shows slow-motion videos of your club at impact, and you can also add additional cameras to capture different swing angles.
For some, that amount of information might be an overload, which is why the lower-priced QED bar might make sense ($6,000). You can see a comparison between the two models here. Overall, the QED has many great features, but if you want more data and accuracy, the EYEXO might be a better option.
Here are several packages available for each model that will include everything you need:
Uneekor QED SIG10 Package ($11,499)
Uneekor EYEXO SIG10 Pacakage ($15,499)
Uneekor also has powerful software options that test your abilities on a virtual driving range as well as a full simulation on golf courses. They will add between $1,000 to $2,000 to your purchase. Also, Uneekor integrates with popular 3rd-party providers such as TruGolf E6 and The Golf Club.
If your budget is between $10,000 - $20,000, Uneekor is probably your best option for a permanent simulator build. The combination of features, accuracy, and software is hard to beat at this price level.
Alternatively, TruGolf Simulators are another great choice at this budget level for those who want an integrated system that you can easily build.
Foresight Sports GCQuad - Best Overall Premium Option
If you want to take things a step further, have a budget of around $20,000, and beyond, then I believe Foresight Sports is your best option. I have spent a lot of time on their launch monitors over the past six years, and in my opinion, they are the best in the industry. Full disclosure, I am looking at upgrading from my SkyTrak to a GCQuad within the next year.
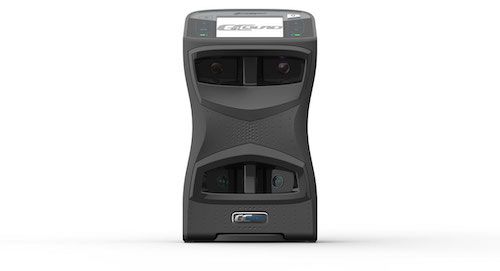
The Foresight GCQuad is a camera-based launch monitor that is the top pick of teaching pros, clubfitters, and professional golfers. It delivers every piece of data you'll ever want about your golf swing and is incredibly versatile. You can use it at the range with or without a smartphone or tablet (the battery lasts 6-8 hours). More importantly, its accuracy and FSX software for home golf simulation is top-notch.
I believe the GCQuad is the top choice for golfers who want the best of everything when it comes to accuracy and software and wants a versatile launch monitor that is portable and used in multiple scenarios outside of their home. You can create a permanent build and have the option to bring it elsewhere, which is a big difference compared to other premium options like Uneekor, TruGolf, and Full Swing Golf.
However, be prepared to pay for it! The GCQuad starts at $11,000. Adding the FSX Software is another $3,000, and if you want full clubhead measurement, that adds $4,000. That's all before purchasing everything else you need to create a home simulator.
Here are some popular packages and their costs:
Foresight GCQuad SIG10 Package ($19,999)
Foresight GCQuad SIG12 Package ($20,399)
Thoughts on Trackman
Over the past decade, Trackman has established itself as one of the premier brand names in all of golf. Their radar-based launch monitor is another top choice for home simulator setups.
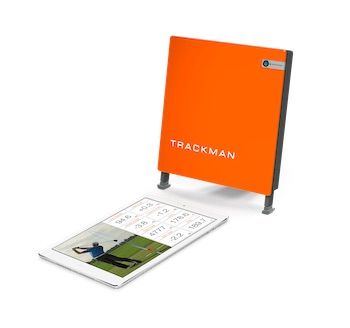
Trackman's Virtual Golf 2 software delivers one of the best simulator experiences money can buy. However, Trackman does have limitations that golfers should be aware of.
Because Trackman uses radar to track the golf ball, it does require significant space. As you can see in the image below, Trackman recommends up to 9 feet behind the ball and 15 feet in front of the golfer for a total of 24 feet. For many golfers, this is a deal-breaker. The overall suggested room size is 15 x 25 feet, which is massive!
I have used Trackman indoors quite a bit, and I can tell you from personal experience that accuracy will suffer if you have less space. Specifically, I've noticed that my spin rates can be off by as much as 1,000 - 2,000 RPMs, which will affect your simulated ball trajectory and distance numbers.
Trackman's latest model costs just shy of $20,000. When you add software costs, you can expect to spend upwards of $30,000 to $50,000 (and beyond) on a full simulator system.
Trackman can also be used outside of your simulator setup and the range in the same way as the Foresight GCQuad. But in my opinion, based on my experience with both products and speaking with multiple experts in the industry, I believe the GCQuad is a better choice between the two if your primary use is for simulation. Don't get me wrong - Trackman is an excellent product, but if you don't have the maximum space requirements, you will have spent a lot of money on a product that will not give you the best accuracy when used indoors.
The Ultimate Simulator Builds - HD Golf & Full Swing Golf
Would you like to have the same home golf simulator setup as Tiger Woods or other top PGA Tour players? Who wouldn't?
If you have a massive budget, a huge space, and want someone to come to your home and build you the best simulator setup money can buy, then you can check out HD Golf or Full Swing Golf.
The HD Golf Ultimate Training Package has it all. For the price tag of $56,400, you'll get everything you can imagine. A team will show up at your house and build a simulator that will make your buddies drool.
You'll have multiple cameras recording your swing and ball flight. A pressure mat to track your weight transfer and balance. The best turf, projector, impact screen, and software that money can buy.
The other top option in the "ultra-premium" category is Full Swing Golf. This is for the golfer who wants to spare no expense and doesn't want to lift a finger when having it built out. Their systems start at around $40,000 to $55,000, but you can expect to spend much more.
Interestingly, Full Swing Golf recently announced a lower-priced launch monitor. The Full Swing Kit has an impressive list of features (built to Tiger's specs)and simulator capabilities for $3,999. You can reserve access for the Summer 2021 release here.
Which Home Golf Simulator Is Right for You?
If you have made it to the end of this article, then your head might be spinning. If you are in the market for a home golf simulator, there are options at every price level, and hopefully, you understand what you will get for your money now. A great resource to purchase items and have your questions answered is Shop Indoor Golf.
I have watched the market evolve over the past five years, and the technology keeps improving. There will be more options in the coming years that will service buyers at every price point. It's an exciting time to be a golfer who wants to keep playing in the comfort of their own home. If you have any questions, don't hesitate to contact me here. Also, I will continue to update this guide as things evolve.
We care about the protection of your data Read our Privacy Policy