Regripping golf clubs at home can be a nice little project that will save you some money and also leave you feeling accomplished. Since I am not the most "handy" person in the world, and don't have much experience regripping golf clubs, I decided to enlist the help of my friend Nick Banks who actually knows what he is doing since he is a PGA professional.
Making sure you have fresh grips on your clubs is extremely important, and I wrote this article a while back explaining why. Typically the rule of thumb is that you can replace your grips about every 18 months if you play 1-2 times a week, and live in a cold-weather climate. If you are playing all year long, then it makes sense to change them every year.
To give you the complete rundown I will let you know what material you will need, where to get it, and how to do it.
The Supplies
Here is a short list of tools and supplies you're going to need to regrip your golf clubs at home. Everything can be purchased on Amazon, and if you're a Prime Member like me you're probably getting everything from them already (the amount of Amazon boxes showing up to our house every week is staggering).
The List:
- Hook Blade - you'll need this to remove your grips. You can purchase one for just over $8 here.
- Utility Knife - this will help remove the tape from your shafts. You can purchase one for roughly $10 here.
- Regripping Kit - This is the bestselling kit on Amazon and will get the job done. It includes solvent, tape, and a rubber vise clamp for about $11.49 here. Alternatively you can buy the tape and solvent separately if you already have the rubber vise clamp.
- Grips - You can't forget the main ingredient! Choosing your grips is completely subjective, and you can go with what feels comfortable. Personally I play with Golf Pride MCC grips and absolutely love them for the dual layering. The classic Tour Velvet are the most popular and a great option as they are about 50% less expensive.
Nick Banks noted that Wynn Grips can be a little more difficult to do yourself because the tips are harder. One thing I would recommend if you are going to be regripping golf clubs at home is to possibly order one or two extra grips in case you make a mistake (more on that later).
Miscellaneous Items You Should Have - You're going to need a bunch of towels to protect your floor and clean off your clubs. It also makes sense to have a paint liner to keep beneath to catch excess grip solvent that drips. Most importantly you will want to have a vise, but we'll show you how to regrip your clubs without one as well.
Step 1: Remove Your Old Grips
In order to save time and increase efficiency, the best way to regrip your clubs is to complete each task in an assembly-line fashion.
The first order of business is to remove all of your old grips using your hook blade. It's a better idea to use this tool instead of the utility knife because you don't want to damage your shafts (especially the graphite ones). It's relatively easy to use the hook blade.
You simply place the hook underneath the club and gently drag it down until your are making an incision fairly far down the entire grip. Once you've gotten enough off, the grip should come off pretty easily. Please make sure you are cutting away from your body to avoid injury.

Step 2: Remove Tape
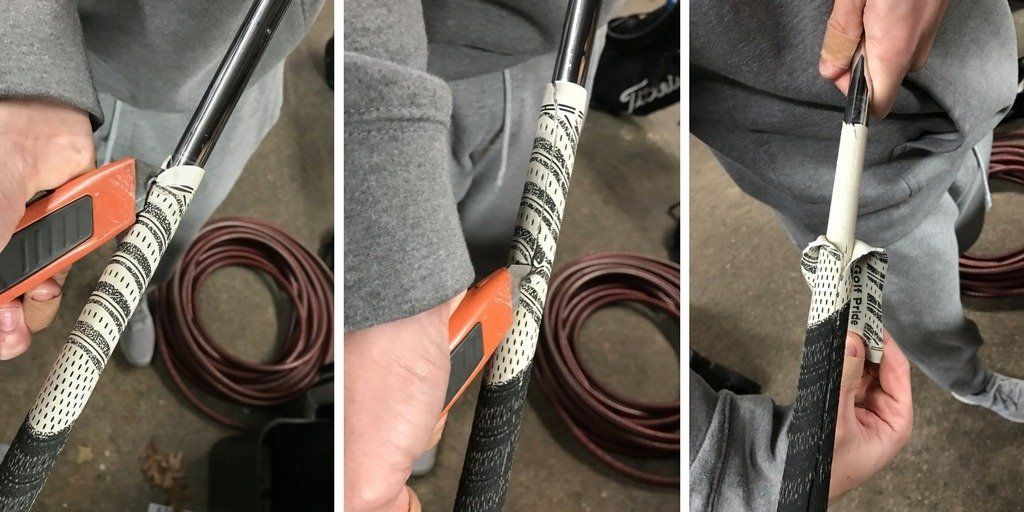
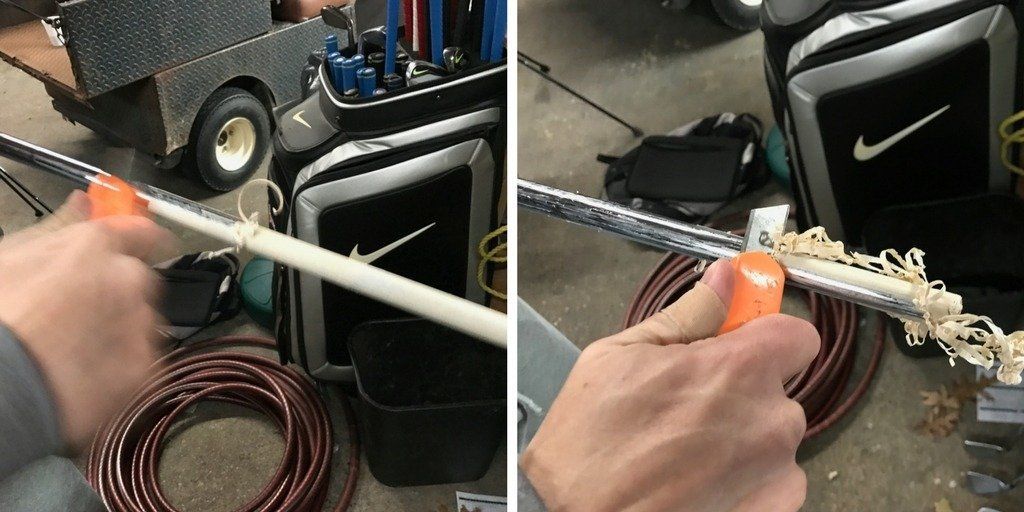
The next order of business is to remove the old tape. This will be the most time-consuming part of the exercise.
Take your utility knife and score across the old tape all the way up the entire shaft until it's completely gone.

You don't have to worry about damaging steel shafts with the blade, but you want to be extremely careful with graphite. If you happen to have a heat gun (or even a hair dryer) you can get the old tape warmer and it will make it easier to peel off by hand.
Step 3: Apply the New Tape
Now it's time to put the new tape on the end of the shaft. The key here is that you don't want to apply the tape below the bottom of the actual grip. The easiest way to do that is just to hold up your grip next to the shaft and leave your thumb at the bottom of where you want the tape to end (you could also measure it with a tape measurer if you want to be completely exact).

You don't necessarily need tape on the bottom 1/4 - 1/2" of the grip so it's OK to leave more room on that side underneath the grip.
Now you are going to apply the tape to each of your clubs. Here's a brief video showing you how to do it properly:
Step 4: Applying the Grip
Here is the most important step in regripping golf clubs, and where you really want things to go correctly. Now you are going to apply the actual grips.
There are two ways to do this - you can do it with a vise, which is why purchasing the grip kit will help, or you can do it without the vise.
After watching both methods executed, I would advise most people to use a vise if they can, but it's completely possible to do it without one.
Before you apply the grip you need to apply grip solvent to the inside of the grip. The key here is to be extremely generous. You almost can never have enough grip solvent! If you have a spray bottle or a tube, the first step is to place your finger over the small hole at the butt of the grip (this will prevent it from leaking out). Then you apply a generous amount of solvent to the inside of the grip. Then you will cover the opening at the bottom with your other finger and shake it back and forth to coat the inside evenly.
The last step before you apply the grip is to pour the excess grip solvent from the inside of the grip evenly over the tape on the shaft. You can place a paint liner beneath your grip to catch the excess solvent in case you want to re-use some. This is another step where you want to be generous with the solvent. You can even spray some extra solvent on the tape afterwards, it's only going to make it easier to apply the grip.
Now comes the most important step - applying the actual grip.
Before we get to each method there is one main piece of advice I would give anyone who is regripping golf clubs at home. You absolutely want to get that grip on quickly and aggressively. If you don't get the grip all the way down and it gets stuck, then you will likely be throwing that grip away. For you beginners out there, I would expect to possibly botch one or two attempts, which is why I recommend buying a couple of extra ones.
No-Vise Method
If you're not going to use a vise, then you will need to hold the club extremely steady by wedging it between your feet on the ground. Here is a video showing this method.
One word of caution - you have to be careful how much force you are applying on the shaft. You don't want it to bend too much where it could potentially snap.
Vise Method
If you have a vise at home, then I would definitely recommend using it. You'll have a lot more leverage and it will make it easier to get the grip all the way down to it's proper position. You simply place the rubber insert from the grip kit in the vise and tighten it enough so that the club is not going to move when you are applying force to get the grip all the way down.
Here is a video of putting on a grip with the vise to show you what it looks like. We were having some issues and you can see how much force Nick had to apply to get the grip on there, which is why having the vise as leverage definitely helps:
Once the grip is completely secured you can do some last-second adjustments. Some people like to have the logo properly aligned on the grip, and you can do some maneuvering with your fingers to get the right position before the grip begins to set.
Additionally, you can tap the butt end of the grip on the floor and apply some pressure from the top to make sure it's completely secured to the end of the club, and that there is no space between the end of the shaft and the butt-end of the grip.
Step 5: Clean Up and Let it Set
You're pretty much done at this point, congrats! Take a towel to wipe off the excess grip compound and let your clubs dry off for a few hours before you start using them again.
Regripping Golf Clubs at Home - Should You Even Do It?
The whole process of regripping golf clubs is probably going to take you somewhere between 1 to 2 hours. I wouldn't call it an easy project, but once you do it once you'll probably be comfortable doing it forever.
The main question is how much money it can save you, rather than having one of the golf retailers or local pro shops do it for you. Depending on who you go to, you're probably going to get a $2-$4 upcharge on each grip for the labor. So you're looking at about a $30-$60 savings.
One thing I would caution you to consider is if you make an error. Messing up 1-2 of your grips will set you back a decent amount of money, and wipe out most of your savings. If you had taken it to a pro shop they would have to incur the cost themselves for any error they make.
Aside from that, regripping golf clubs at home is a fun little project that can make you feel a little more accomplished as a golfer.
Here is a brief recap of the recommended tools you will need, with links to Amazon:
We care about the protection of your data Read our Privacy Policy